

Architectural changes
No matter what case works better for you, the first step is always to create and configure an Edgee project. Based on the existing architectural pieces, there are at least three cases to consider.Case 1: just Edgee
This is the easy case, where Edgee is the first destination of DNS resolution and is placed in front of your website origin.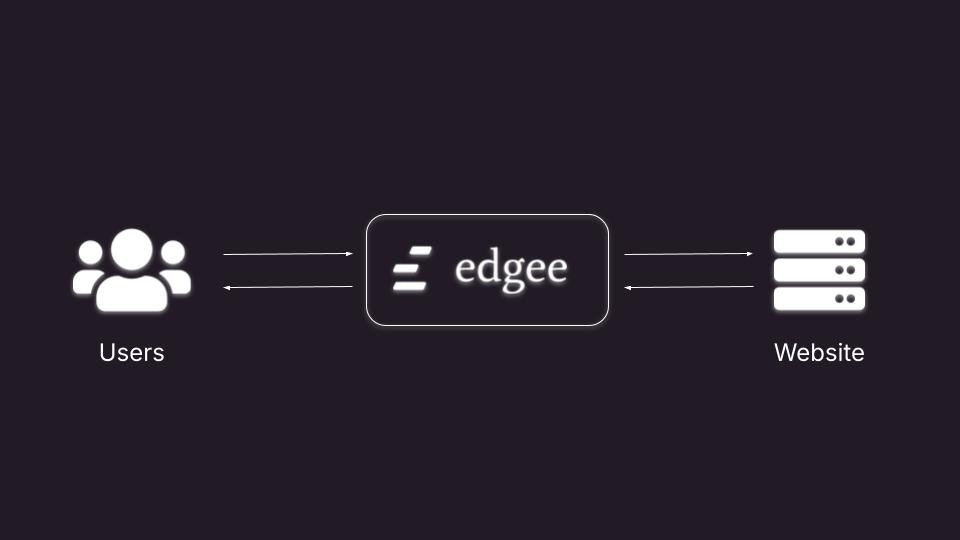
Case 1: Edgee is the first destination of DNS resolution, in front of your website origin.
Why and when it makes sense
This is by far the easiest way to migrate to Edgee and it’s ideal for brand new projects or when you don’t already have an existing CDN in place. Edgee will take care of everything for you and you won’t need to worry about managing additional infrastructure.What needs to happen
To get the full benefits of Edgee’s performance, you might want to enable caching on Edgee. If you need to use a custom domain such asyourwebsite.com, you’ll need to set up the SSL certificate.
Here you have two options:
- Edgee can generate a certificate for you via Let’s Encrypt.
- You can install your certificate on the Edgee platform.
Note: You could still use an external CDN to serve static assets such as images and JS/CSS files.
Case 2: Edgee in front of a CDN
Edgee is the first destination of DNS resolution and is placed in front of a CDN.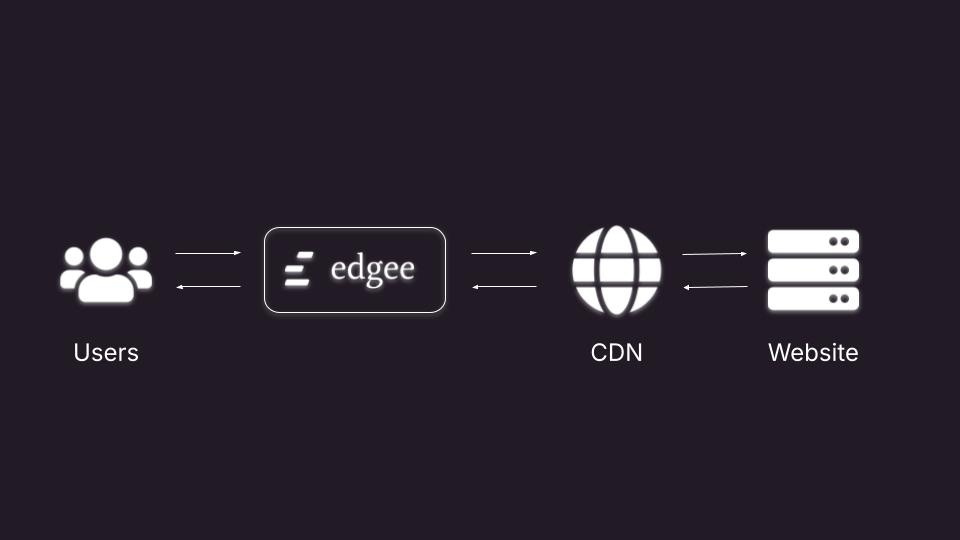
Case 2: Edgee is the first destination of DNS resolution, in front of a CDN.
Why and when it makes sense
This case makes sense when you already have a CDN that takes care of a few things such as caching and DDoS protection. Edgee can sit in front of such CDN and provide additional advantages for your data collection such as filtering out bot traffic, enforcing HTTPS connections, password protection, and so on.What needs to happen
If the existing CDN is already taking care of caching, you probably want to keep caching disabled on Edgee. Because Edgee becomes the first destination for DNS resolution, all traffic to your existing CDN will come from Edgee. This means you need to make sure Edgee won’t be considered an attacker by the existing CDN (or other security solutions in the network chain).Case 3: Edgee behind a CDN
Edgee is placed between a CDN and your website origin. In this case the CDN already takes care of DNS resolution.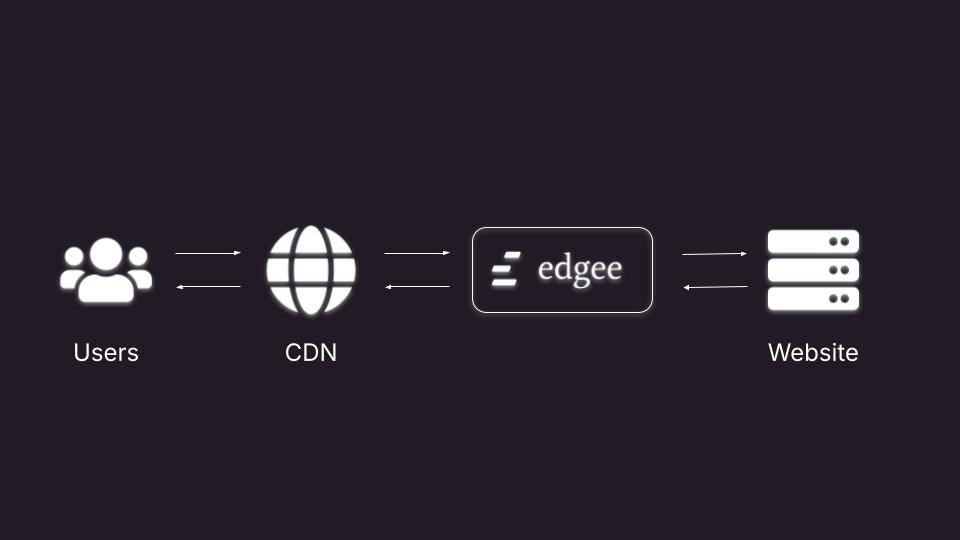
Case 3: Edgee is between a CDN and your website origin.
Why and when it makes sense
This case makes sense when you already have a CDN that takes care of a few things such as DNS resolution and DDoS protection. Edgee can sit behind such CDN and provide additional advantages for your data collection such as caching, filtering out bot traffic, password protection, and so on.What needs to happen
No need to set up an Edgee custom domain and SSL certificate. You only need to update the routing policy of your existing CDN to send all traffic to Edgee. In order to get most events collected at the edge, HTTP requests will need to reach Edgee for data collection so you might want to disable caching in the existing CDN for HTML pages. Then, to get the full benefits of Edgee’s performance, you could enable caching on Edgee.Note: Edgee will still track events (client-side) if it detects that HTML pages are being cached by your CDN.
Case 4: Edgee is an additional call within your workflow
Edgee is placed alongside your CDN, your origin server still receives requests directly from the CDN.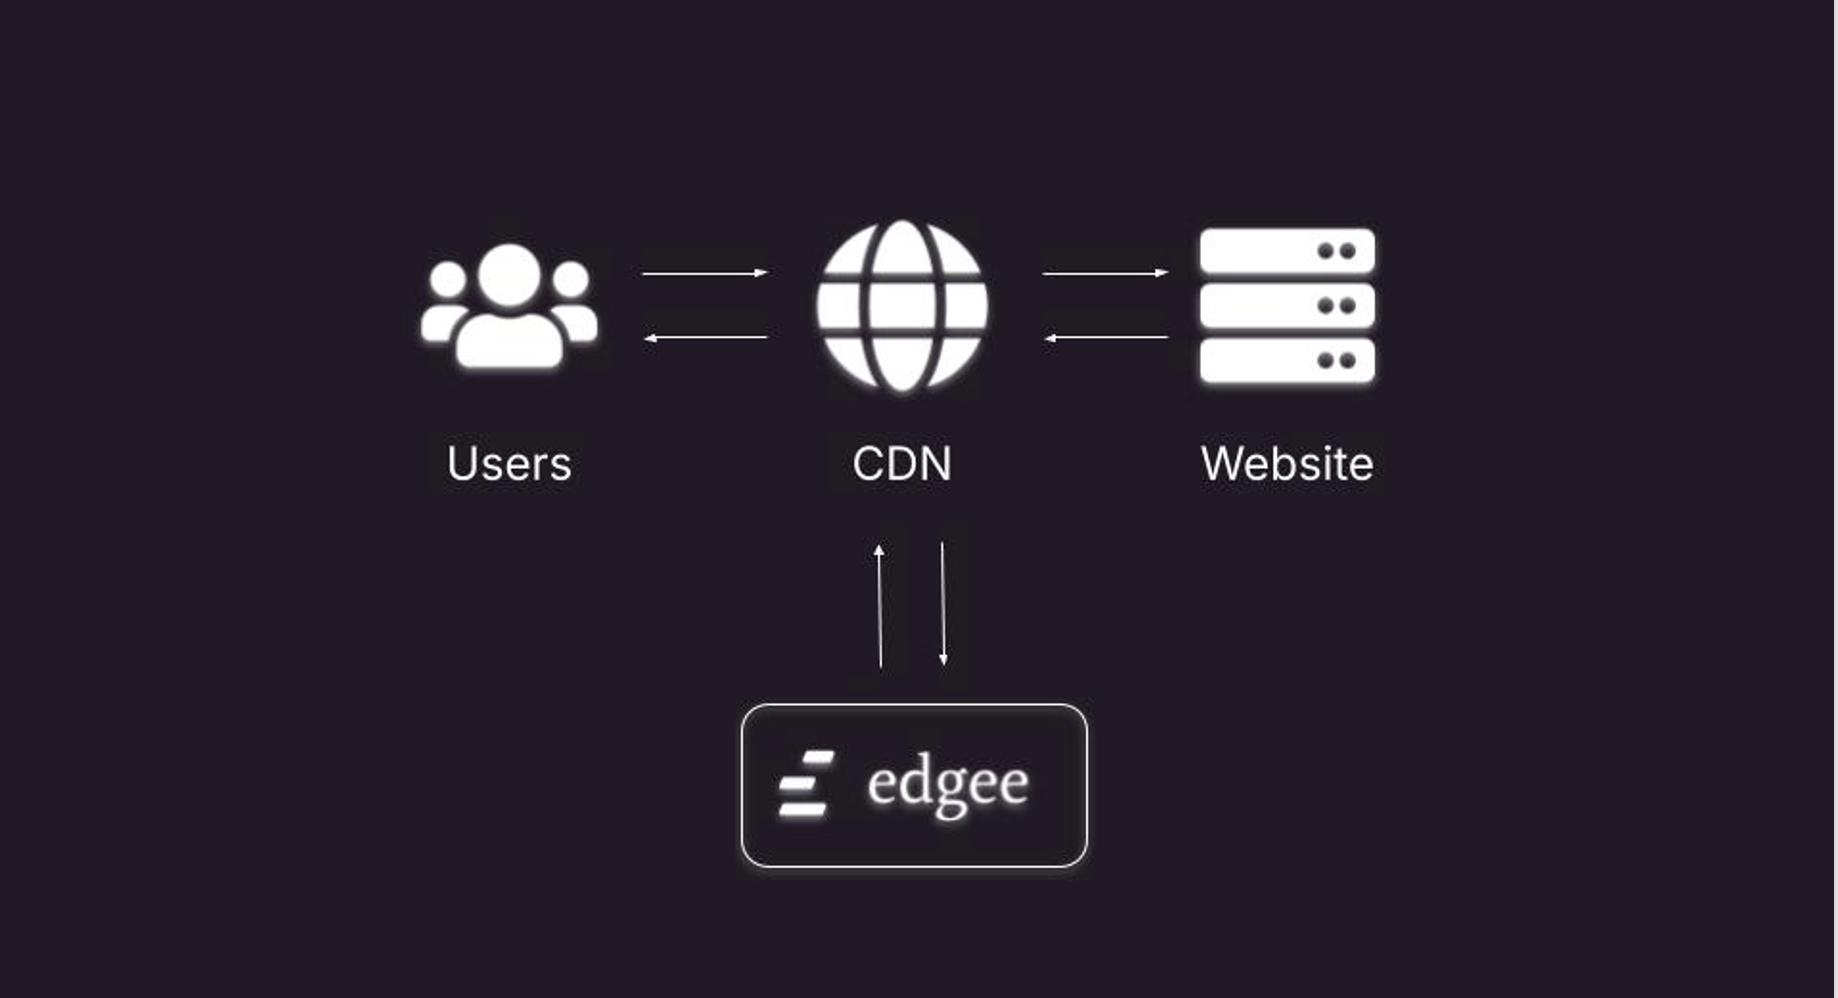
Case 4: Edgee is an additional call within in your workflow
Why and when it makes sense
This case makes sense when you want additional security control and already have a CDN that handles DNS resolution and DDoS protection. Edgee can sit alongside your CDN ensuring you maintain full control over DNS resolution and TLS termination, with minimal infrastructure changes and no CDN chaining.What needs to happen
-
Configure your CDN to forward all incoming traffic to your Edgee endpoint (e.g.,
yourproject.edgee.app). - Route traffic from your Edgee endpoint to to your domain.
-
Set both the Cookie Domain and Frontend Hostname fields (in Console > Project Settings > Compute) to match your custom domain (e.g.,
mywebsite.com). - Secure the connection by adding required headers in Edgee. This ensures only authorized requests from Edgee are accepted by your CDN and forwarded to your cloud/website.
Note: Edgee will continue to track client-side events—even if your CDN caches full HTML pages—so you don’t lose visibility into user interactions.
Code changes
Once Edgee is integrated in your web architecture, we recommend following the following steps to update your code. This process is designed to be incremental and provide you with opportunities to verify that everything is going smoothly, while avoiding any data loss.Step 1: Integrate the Edgee SDK
The first step is integrating the Edgee SDK into your website, ideally on all pages. Learn more about integrating the Edgee SDK.Note: No events are being captured yet, but this is a useful checkpoint to make sure that your Edgee configuration
and code integration have been deployed successfully.
Step 2: Configure your Data Collection component(s), but keep it disabled
It’s time to configure a new Data Collection component for your Edgee project. Each component comes with a different set of configuration parameters such asMeasurement ID, API Key, Project ID, etc.
Make sure to configure each field correctly and then click Add component.
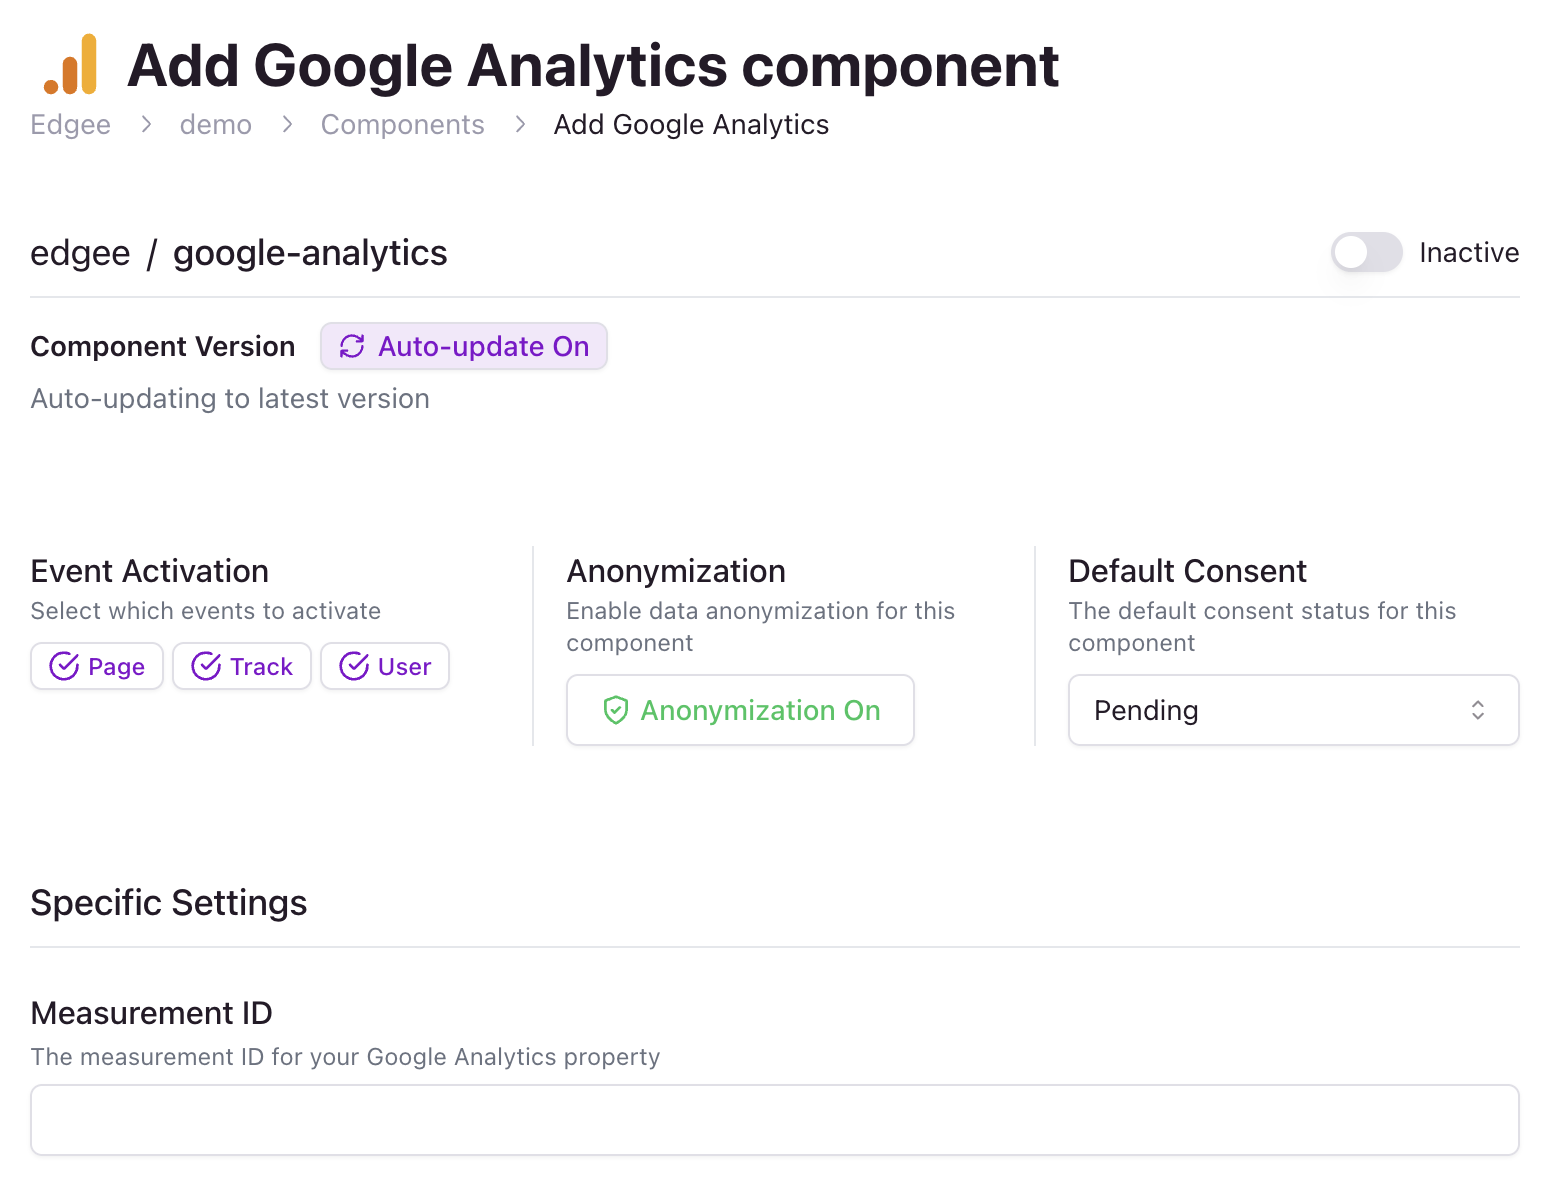
Go to your project > Components, then add your first component.
Activate component switch.
Note: It’s very important that you keep your Data Collection component(s) disabled for now to avoid duplicated events.
Step 3: Disable pageview events with traditional analytics and activate Edgee component(s)
Next, you want to disable the automatic collection ofpage events with your traditional analytics SDK.
For example, you can disable it as follows:
page events for you
while we start collecting page events at the edge, without having to remove the Google Analytics SDK entirely.
Once you’re ready to deploy the code change, open the Components panel on your project page.
Here you’ll find the currently inactive component that you’ve configured during step 2.
You’ll need to deploy the code change and then activate the component immediately after.
Note: It’s very important that you activate your Data Collection component(s)
immediately after deploying the code changes to avoid any data loss.Alternatively, you could keep the Data Collection component(s) active at all times
and deploy code changes for step 1 and 3 in a single deployment.
Step 4: Convert client-side event tracking and remove traditional SDKs
Now that Edgee is integrated on all your pages and you’re correctly collectingpage events at the edge,
it’s time to convert all the other events. This step can be incremental but we recommend converting
all events at once so you can confidently remove any unnecessary SDK from your website to improve performance.
For example, you’ll convert this:
Alternative migration strategies
We understand there are cases where you want to integrate Edgee and compare it to your existing solution before fully committing to removing all traditional analytics SDKs. In this case, you can still follow the migration guide above with a few variations. For example, you could set up a new Google Analytics Property or Amplitude Project. Then you’d configure Edgee to sendpage events to the new property/project while still sending events to the old ones.
This will allow you to compare the two properties/projects and obtain a clear view of how much data you’re missing without Edgee.
Once you’re happy with the results, you can go through step 2, 3, and 4 to let Edgee send events to your main property/project and convert your tracking code to use the Edgee SDK.